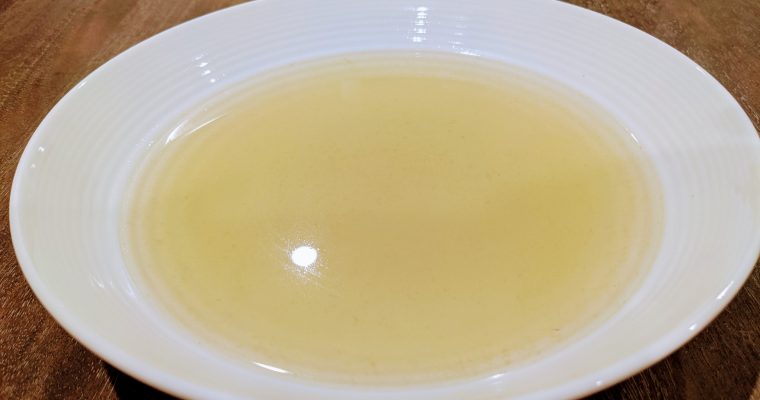
Stock is pretty easy to make and great to have on hand to add flavor to a recipe or as a base for a sauce. It can be made from the frozen remains you saved from a roasted chicken, beef bones you buy from the local butcher for 29 cents a pound, or any other meat scraps you’ve saved. There’s something very earthy and homely and satisfying about it; making stock makes you feel good.
Stock vs. Broth
Technically stock is cooked using bones and herbs and broth is just any liquid that had meat cooked in it. Broth tends to be thinner but more flavorful and is usually seasoned, whereas stock is not. Traditionally, stock is used for adding body and as a base for sauces, and broth is used for enhancing flavor, often used in soups or in place of water in recipes. (“Water is the bane of flavor” is an old chef adage.)
In practice, the terms stock and broth tend to be used interchangeably. The difference is minimal anyway – there’s no reason why you can’t have meat in a stock, or reduce it down to increase flavor and use as a broth.
Ingredients
The ingredients are highly flexible. You need some bones, maybe with some meat on them, some vegetables, and some herbs. When I make stock more deliberately, I use the below ingredients, which yield a very flavorful stock. Use this as an approximate guide, depending on what you have on hand. You can reduce cooking time or increase water for a lighter stock.
In general, however, I just put all vegetable discards from my normal cooking prep into a bag in the freezer, and same with meat bones and leftovers. When these bags are full, I make stock.
- 3-4 lbs chicken carcass (bones & meat)
- 3-4 qts water
- 6 cloves garlic, squashed
- 2 carrots, roughly chopped
- 3 stalks celery, roughly chopped
- 2 medium onions, roughly chopped
- Herbs, tied in a bunch with string – a traditional bouqet garni comprises bay leaf, thyme, tarragon, and parsley, but nearly any combination of herbs will work. I like to add sage, thyme, and rosemary, but will throw in any herbs I have on hand.
Instructions
White Stock
- To make white stock, place vegetables in the bottom of the pan, then the herbs, then the meat and bones.
- Add enough water to just cover. Don’t overfill – the bones will settle as they cook, especially if frozen.
- The rule of thumb is 1 quart of water per pound of meat/bones.
- Bring to a simmer, then…
- Option 1 – Stovetop: very slightly reduce the heat. Cook just below a simmer for 3-5 hours.
- Option 2 – Oven: place in a preheated oven at 200F, and cook for 4-12 hours.
- If desired, you can simmer the finished stock to make a demi-glace by reducing by about 5 times. (A glace de viande or equivalent is reduced by about 10 times.)
- Let cool, then strain through a strainer/chinois into a large bowl or container. Line the strainer with cheesecloth if you’re going for a clear broth.
- Refrigerate overnight, then skim the congealed fat from the surface. If not using within the week, freeze it. (See below.)
NOTES:
- Check every so often and add water if desired. If you’re at the correct temperature you generally don’t need to add much water, if at all.
- How long you cook the stock and how much additional water you add depends on desired strength. I usually do around 4 hours on the stove, and 8 hours in the oven. There are some that say you get more nutrients at a low temp for longer (up to 24 hours.) This is called “bone broth.”
Brown Stock
Brown stock gets its name because of its color. It gets its cover from roasting the vegetables and bones in the oven before beginning the above process. This adds great flavor, but also adds a step and some additional time.
- For brown stock, follow the same process as above, but roast the vegetables and bones in the oven at 450F until browned, about 45 minutes.
- Transfer to the stock pot. Be sure to scrape/deglaze any remaining bits from the roasting pan into the pot.
The “Perfect” White Stock
A perfect white stock from a culinary perspective should be clear, which is accomplished by rinsing your meat thoroughly beforehand, never getting close to a boil (which emulsifies the fat) and carefully skimming every 15m for the first hour or so. You should also be very gentle when pouring off the liquid from the stock pot and pour through a cloth or cheesecloth to strain. It is surprisingly difficult to get clear broth, and only worthwhile if you’re making fancy sauces that need to be aesthetically perfect. If you fail, there is no difference at all except that it is cloudy.
Storage
- Pour stock into ice cube trays and freeze, then toss into a zip-lock with the date and type of stock. This gives very fine control over how much you can use. (I use two or three cubes for deglazing and making sauces.)
- Stock can also be stored by using larger flat containers such as a food storage container: line with plastic wrap, pour, freeze, and remove to create bricks. Measure the volume as you pour and write it on the outside of the brick.
- Refrigerated stock lasts about a week or two. Frozen stock lasts up to about 6 months.