Ingredients
(Bakers % in parentheses)
- 500g AP flour
- 360g water (72%)
- 10g salt (2%)
- 1/2tsp yeast (.4%)
Instructions
Prepare the dough
- “Autolyse” the yeast. (Fancy word for hydrate.) Mix the flour and water in a tub or bowl and let sit for 20-30m. (Water temp ~95 degrees.)
- Add the salt and yeast. Mix thoroughly using the pincer method.
Bulk Ferment (First Proof)
- Fold twice in the first hour or so. (Once every 30 minutes.)
- Let sit until tripled in volume, about 5 hours from initial mix.
Second Proof
- Gently turn out the dough onto a floured counter. Scrape the edges with your fingers to help it out.
- Shape the dough into a ball by folding the edges with one hand into the center on top, holding in place with the other hand as you go around. Be gentle! You want to try to maintain most of the gas in the dough.
- With well floured hands, flip over onto a non-floured area. Cup your hands around the back of the dough and pull the ball toward you. The bottom will stick to the counter a bit and tighten up the ball. Your little and ring fingers will do most of the work. Work your way around the dough until you have a nice, relatively well-formed ball.
- Place seam side down in a well-floured proofing basket or well-oiled bowl.
- Start preheating the oven now. Place a dutch oven with lid into the oven and set to 475F.
- Proof for about 60 – 75m. Use poke test to confirm. Sometimes, especially in warmer weather, you may not need the full 60m.
Bake
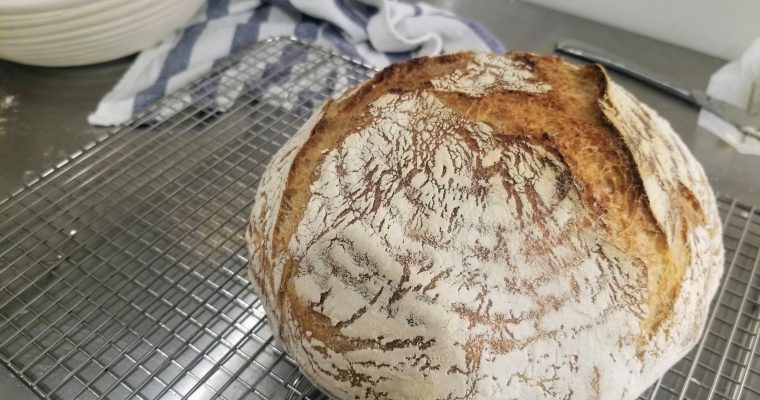
- Turn out onto parchment paper, so that the side that was on the bottom of the basket or bowl, is now the top. Because the dough was folded and flipped before you placed in the basket, those folds will open slightly when steam needs to escape, eliminating the need for scoring the dough and creating a beautiful natural look.
- Remove the dutch oven from the oven. Remove lid and drop in the loaf on the parchment paper. Replace lid. Don’t forget the lid is HOT!
- Bake for 20m, then remove the lid.
- Bake an additional 30m or until crust is a dark brown.
- If this is your first time baking this bread, leave it in longer than you think it should be in there. The darker crust gives a really nice flavor, but can look overdone.
This is a high hydration bread, and will be a wet, sticky dough. The dough will stick to your hands, which can be mitigated slightly by wetting your hands occasionally. Squeegee your fingers as best you can one by one with your other hand back into the bucket.
The “pincer method” consists of folding the dough in half, then squeezing between your thumb and forefinger (like a crab’s pincer) and essentially slicing off a piece. Repeat 4 or 5 times as you move across the dough. Rotate the tub a quarter turn and repeat.
“Folding” consists of scooping your hand under the dough, lifting that part up to stretch the dough, and fold it over onto the other side. Rotate the tub and do this again, until you’ve gone all the way around. (About 5 folds.) Then flip it over, so it’s laying on the folds. This helps give the dough some structure.
The “poke test” is poking the proofing dough. If the indent immediately pops back out, it is underproved and needs more time. If there is an obvious indent, but it very slowly pops back out, you’re ready to bake! Otherwise, if the indent remains you have overproved the bread. It will still be delicious and is worth baking, but the texture will be off, and may even collapse in the oven if severely overproved.